This is just a short post about an annoying issue I encountered today while updating my automated Ubuntu installer with Ubuntu 14.04 (Trusty Tahr). I have a PXE based network boot process to automatically install and configure Ubuntu server instances. The server to be installed will PXE boot and then get the installation files and preseed configuration file via HTTP. This worked well for prior LTS releases. I don’t bother with automating non-LTS releases as their lifespan is far too short for “production” use.
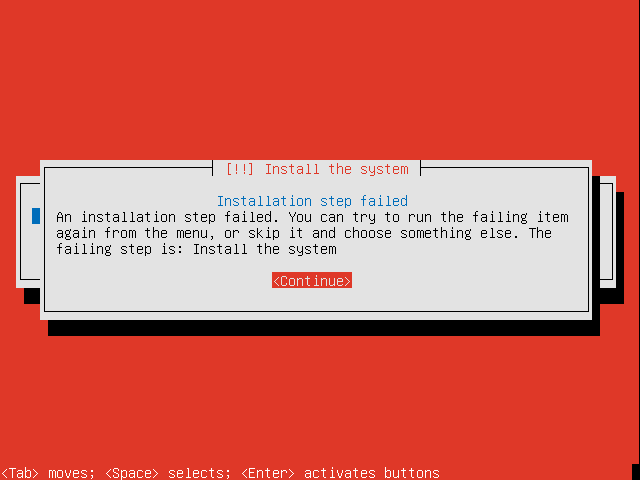
I updated the install server with the new 14.04 server images (AMD64 and i386). I then updated my standard preseed configuration file with the new paths to 14.04 and set off a server installation. Unfortunately, not long into the installation process an error message was displayed. “Install the system” was the title of message and the error was “Installation step failed” “An installation step failed. You can try to run the failing item again from the menu, or skip it and choose something else. The failing step is: Install the system”.

Not terribly useful, if I say so myself. Looking at the installation log on VTY-4 (accessed via ALT-F4 on the console), I saw messages about “main menu: INFO: Menu item ‘live-installer’ selected'” followed by “base-installer: error: Could not find any live images”. Again, not very useful.
To cut a long story short, after much time using Google, I found the solution. The way base Ubuntu is installed seems to have changed with Ubuntu 12.10 (Quantal Quetzal). It seems that rather than installing individual packages initially, a base preconfigured file-system is deployed. This is now contained in a file called “filesystem.squashfs” which is located at “/install/filesystem.squashfs” on the installation media. It seems that when installing via the network (in some situations), you need to configure the preseed file to use this “default” filesystem from the network. This is done in your preseed file by adding the “d-i live-installer/net-image” option, such as in the following line:
d-i live-installer/net-image string http://10.1.1.2/trusty-server-amd64/install/filesystem.squashfs
where 10.1.1.2 is your network installation server and /trusty-server-amd64 is the location of the installation media on the network installation webserver.
Once that is in place, you’re good to go! As I said before, this is only necessary since Ubuntu 12.10. As a result, all of those upgrading our installations from 12.04 LTS to 14.04 LTS may need to be aware of this. There is surprisingly little reference to this on the Internet. Do not many people install over the network in isolated install networks?
Thank you! I’ve been searching for THIS info for toooo long. Could you post the site where you’ve found this info?
Hi,
The link that pointed me to the necessary preseed configuration was http://irclogs.ubuntu.com/2012/08/03/%23ubuntu-installer.html
Regards.
I was about to pull my hair out while figuring out this.
What I did was to use lubuntu alternative ISO (because they are the only ones who seems to provide it).
Even for server Canonical doesn’t provide proper net-install images.
Nope, not quite fixing my probelm, but I had a similar error message
– I am setting up a Trusty server image on a VirtualBox VM, and I have a headless PXE boot system as well.
But mine fails on writing the partition table to /dev/sda – I suspect a driver issue.
Were you able to solve your partitioning problem? I am trying to do an unattended install of 14.04 and the thing keeps failing at the partitioning stage. I am wanting to wipe out any current partitions and use the entire disk for an LVM partition. Nothing fancy. I just want it unattended.
I’ve been looking for something like this since 12.10, I tried several different ways to get around not having the alternate ISO, but building a large mirror was not feasible for me.
Good find! I’ll try your suggestion.
I’ve been using Centos for years but wanted to try out Ubuntu’s server and wound up wasting 7 hours due to this problem. I tried every combination I could, AMD64, i386, minimal, network, etc. Everything failed at the same place mentioned by TriMike.
Holy cow…I’ve been banging my head on this on and off for a while now. THANK YOU!
thank you!
I’m ashamed to admit how much time I wasted on this!
Awesome posts. Using razor-server provisioning and having found this saved me a ton of time.
+1; I needed this for razor-server too. Thanks!
How did you get it working with Razor? Razor doesn’t allow you to point directly to the server IP and get a directory listing, so what does your actual preseed file look like?
@Bret @Scott
What exactly did you do to get this working with razor-server?
Do you mind sharing what you did?
-Alex
For me, it was adding this line to the preseed template:
d-i live-installer/net-image string
This will resolve to the repo’s location of the squashfs file.
Here’s that line again, looks like the line was pruned:
d-i live-installer/net-image string \
d-i live-installer/net-image string <%= repo_file(“install/filesystem.squashfs”) %>
Correction:
d-i live-installer/net-image string >%= repo_url(“install/filesystem.squashfs”) %>
where is preesed file location ? can you explain me ..
I encounter the same problem today. I have appended “d-i live-installer/net-image” line to the last line of the preseed files including cli.seed, cloud.seed, ubuntu-server.seed, ubuntu-server-minimal.seed and ubuntu-server-minimallvm.seed, which are located in /preseed on the ISO. But the problem still remains.
Could you give me some suggestion?
Thank you.
I encounter the same problem today. Then I append “d-i live-installer/net-image string http://192.168.0.1/ubuntu/install/filesystem.squashfs” to the last line in preseed files including ubuntu-server.seed, ubuntu-server-minimal.seed, ubuntu-server-minimalvm.seed, cli.seed and cloud.seed which are located in /preseed in the ISO media. But the problem still remains. I have googled a lot, but failed.
Could you give me some suggestions? Thank you.
These comments are getting Razor-specific, but the repo is hosted at /svc/repo, so you’d want: http://192.168.0.1/svc/repo/ubuntu/install/filesystem.squashfs
The generic of that (which includes /svc/repo and the Razor server URL) was:
d-i live-installer/net-image string <%= repo_url(“install/filesystem.squashfs”) %>
Mike,
First of all thank you for guiding us to the right direction. Along with your suggested modifications. I had to do the following, to resolve the issue.
In the tftp default boot image, I had to add
live-installer/net-image=http://192.168.2.x/images/ubuntu-14.04-DVD/install/filesystem.squashfs
Here is the full label
LABEL Ubuntu14_04
kernel debian/linux
append ks=http://192.168.2.x/kickstarts/trusty_ks.cfg vga=normal initrd=debian/initrd.gz live-installer/net-image=http://192.168.2.x/images/ubuntu-14.04-DVD/install/filesystem.squashfs ramdisk_size=16432 root=/dev/rd/0 rw —
Thank you
Chakri
thank you you saved me i was pulling all the hair out of my heed
Holy cow,
You sir have saved me a pile of grief!! Thank you!!!!!
Thanks! I wasted a full day trying to get this working. As I didn’t have a previous setup I assumed I was doing something wrong somewhere. Sigh.
Thanks for posting this !!!!!!!!!!!!!!!!!!!!!!!!!!!!!!!!!!!!!!!!!!!!!!!!!!!!!!!!
After putting the aforementioned line in preseed.cfg, it came up with another error message: “base-installer: error: /tmp/live-installer/filesystem.squashfs has failed to be mounted as squashfs”. I have struggled with this error for several hours…
Excellent. Thank you. It is helpful. I could not this tip anywahere. It worked as you said for 12.10 and 14.04.
d-i live-installer/net-image string http://10.1.1.2/trusty-server-amd64/install/filesystem.squashfs
good work!!! thanks
It would be better if information on what particular steps to follow to preseed were mentioned.
Pingback: PXE无人值守网络安装Ubuntu14.04 | CodeMe
What a great lifesaver! Really worked on my PXE server, thanks!
+1
Thank you
Pingback: ubuntu 16.04 LTS fails with an error “ an installation error occured” while pxe booting - ubuntutextbook
thanks for the valuable information, I’ve been looking for this since 14.04 was released!
I’ve tried both ways of doing the pre-seeding, via including it int the preseed file and via including it in boot options, and it never seems to get loaded. Is there a way to check when and if it gets loaded other than waiting till the installation finishes and seeing that it wasn’t used ? I’ve been racking my brain as to why it’s not working for days. Please help!
My guess, it start working =, when I reduced ram drive definition in default file.My string represents below:
LABEL lin2x
MENU LABEL Ubuntu 14.4.3 KS eth0
KERNEL ubuntu-installer/14.04.3-s/linux
APPEND nolapic nomodeset acpi=off initrd=ubuntu-installer/14.04.3-s/initrd.gz hostname=${HOST} live-installer/net-image=http://192.168.xx.xx/Ubuntu_14.04.3-s/install/filesystem.squashfs ks=http://192.168.xx.xx/Ubuntu_14.04.3-s/ks.cfg — quiet